

The jewelry box – a cherished item in the life of every girl. It holds not just jewels and gems, but also memories and stories. This small, yet significant, piece of furniture is a treasure box of personal style and self-expression. From delicate necklaces to sparkling earrings, each piece finds its rightful place within the confines of this magical box. It is a sanctuary where a girl’s most precious possessions are kept safe. But you don’t always have to splurge on expensive luxury options. Believe it or not, DIY jewelry boxes can be just as durable and effective in keeping your treasures safe and sound. Are you ready to discover your inner artist? Today, we’re going to embark on a creative journey as we delve into the world of DIY jewelry boxes. Brace yourself for a fun and fulfilling project that will not only showcase your artistic talents but also provide a stylish storage solution for your precious accessories. So, grab your tools and let’s get started on this exciting adventure!
Before we start making a jewelry box, let’s talk about some of the trends that have taken place in the following year.
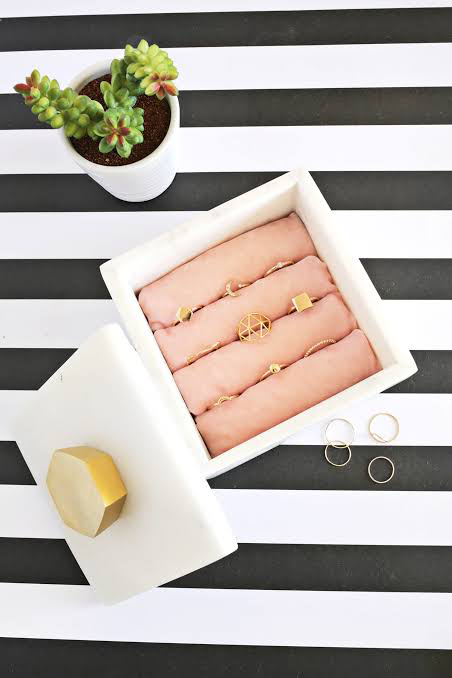
Popular Jewelry Boxes Styles Of Year 2023
2023 is the year of class and fashion. Just like any other thing, jewelry boxes have gain popularity in 2023. This year came with many designs of jewelry boxes to keep your gems in place. Some of the most famous styles are:
Minimalist Marvels: Embracing simplicity, with sleek lines and monochromatic hues. These boxes are designed with simplicity and functionality in mind, making them perfect for modern, understated aesthetics.
Vintage Vibes: Embracing the nostalgia, jewelry boxes with a vintage flair are regaining popularity. They frequently showcase patterns, delicate embellishments, and luxurious, aged coatings, offering a hint of sentimentality and enduring grace.
Geometric Box: Jewelry boxes with geometric shapes the best in modern designs. With their strong lines, sharp angles, and unusual shapes, these boxes have a unique, artistic style. People who want a current and cutting-edge way to store things love them.
Nature’s Embrace: Jewelry boxes inspired by nature, featuring botanical motifs, floral patterns, and sustainable materials, are becoming increasingly popular. These environmentally friendly choices appeal to those who desire a conscious and sustainable lifestyle.
Tech-savvy: individuals into technology are drawn to smart jewelry boxes that feature LED lighting, RFID security, and app integration. These boxes not only safeguard your jewelry but also bring a futuristic element to your collection.
Luxurious Velvet: Jewelry boxes covered in velvet give off an air of wealth and grace. In 2023, they come in a variety of colors like emerald, sapphire, and ruby that look like jewels. These soft, plush interiors treat your jewelry like royalty and add a touch of glitz to your room.
Keeping all these styles in mind today we are going to make a simple minimalistic marvel jewelry box that will look classy along with fulfilling its purpose. Let’s start with the process now!
Material Needed
To make this DIY jewelry box you will need some specific items, these items include:
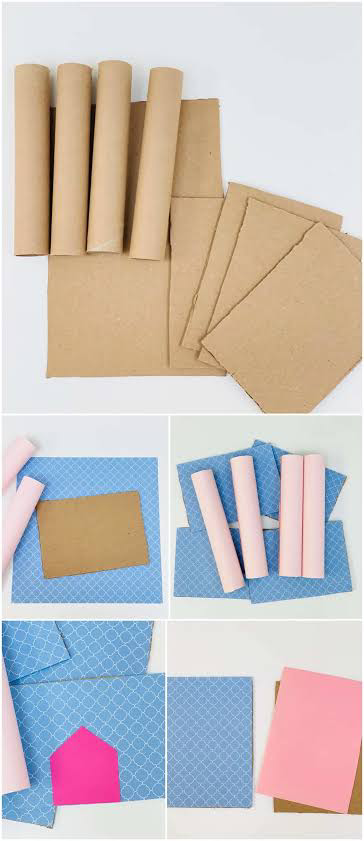
- A cardboard sheet
- Fabric of your choice
- A fancy decoration paper
- A pair of scissors
- Scale
- Glue
- Pencil
- Paint box
- Decorating accessories (pearls, beads, lace etc.)
Step – By – Step Guide to Make A DIY Jewellery Box
Making a jewellery box stipulates careful handling and some critical steps. So make sure you read all the steps carefully before starting the process. Let’s start with the step-by-step guide to make your own DIY jewellery box.
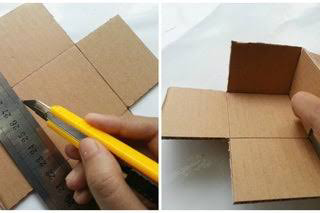
Step 1: Prepare the Box
Initiate with preparing the box by cutting the 4 sides of cardboard sheet. Now fold these sides to stick them together. After folding these sided sand the box smooth and even to avoid any sort of uneven
texture and crumble on the box.
https://promlikesm.live/product_details/41301762.html
Step 2: Choose the Design
Choose the design of the jewellery box you want. According to the current trends you can go with geometric motifs in minimalistic designs. In addition to this, you can have drawers or compartments within the box.
Step 3: Prepare the Exterior
After you have finalised the design. Cover the exterior of the box with the fancy paper or paint it in order to make it look eye-catching. Make sure to paint it with cleanliness.
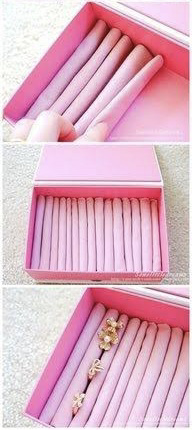
Step 4: Line the Interior
Measure and cut the fabric according to the size of your box to line the interior. Glue the fabric in the box and tighten it. Make sure to pay attention to the details. Ensure the perfect measurement and fitting of the fabric to make your box look neat and clean.

https://alphamom.com/family-fun/crafts/jewelry-box-diy-mothers-day/
Step 5: Make Compartments
To make the compartments, make small cardboard sections and glue them inside the box. These compartments help in better storage of the jewellery items making it easier for you to sort them.
https://shopai5.link/products.aspx?cname=how+to+make+handmade+jewellery+box+at+home&cid=31
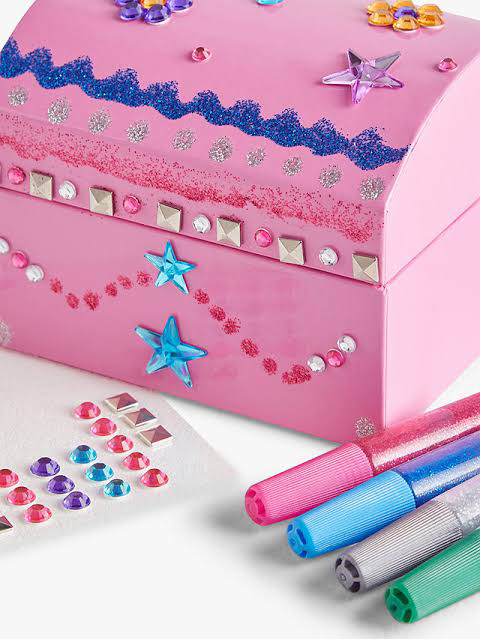
Step 6: Decoration
If you are looking to spruce up your box and give it a touch of personality, consider incorporating the decorative items such as, beads and pearls onto its exterior. These small, shiny embellishments have the power to instantly elevate any piece, making it fancy and eye-catching.
https://www.johnlewis.com/john-lewis-decorate-your-own-jewellery-box/p4509227
Step 7: Let It Dry
Once you’ve finished applying the decorative to your box, it’s important to allow it ample time to dry. This step is crucial to ensure that the glue, embellishments and paint adhere properly and don’t come off easily. So, be patient and give your box the time it needs to dry
completely. Once it’s dry, you can rest assured that your box is ready to be put to use!
https://abeautifulmess.com/make-any-box-into-a-jewelry-box/
Points to Consider
Making your own jewelry box can be a satisfying idea, but before you get started, there are a few things you need to keep in mind so that the box you end up with is not only practical but also beautiful to the eye. Following are some important factors to think about when making a DIY jewelry box:
Layout and Appearance
To get started, picture the look and feel of the jewelry box you intend to make. Think about the style that you want to attain, whether it be vintage, modern, or minimalist, and how your jewelry collection can help you achieve that look.
Material
When selecting materials, make sure they are of a good quality. If you are concerned about the ecology, you should choose eco-friendly materials such as bamboo or repurposed wood. To prevent damage to your valuables, choose a plush and non-abrasive lining material for the interior, such as velvet, silk or suede.
Measurements
The size of your collection to determine how many separate compartments you will need for your jewelry box. Make sure that the different forms of jewelry, such as rings, necklaces, earrings, and bracelets, can fit in the drawers or compartments that you carefully plan out, and that these items are easy to get to.
Safety
If you are concerned about safety of your gems, you should think about installing a locking system to protect your costly jewelry. This will keep your gems protected!
Functionality
Consider how using the box in your daily life may affect its usefulness to you. Should it come with a mirror, a spot for storing watches, or a secret storage area for storing valuables?
Add decorative components
Add decorative to the box, such as paint, patterns, or hardware, to improve the box’s appearance and make it conform to your personal taste in terms of aesthetics.
Accuracy and tidiness
Accuracy in both the measuring and cutting processes is essential for achieving a professional finish. To achieve a more refined appearance, make sure the lines are tidy and clean and the measurements are accurate according the size of the box.
Make Room for Expansion
There is high possibility that your jewelry collection may expand over time, it is important to arrange your box in a way that makes room for any new pieces that you acquire. So, always leave a room for further expansion.
Ventilation and Odor Control
Think about installing ventilation holes or utilizing materials that prevent odors from migrating to your jewelry. Both of these options are worth considering.
Customization
If you want to add a one-of-a-kind touch to your jewelry box, you may customize it by adding initials, names, or heartfelt words to it. The element of customization will give uniqueness and beauty to your jewelry box.
Wrap Up
By taking into account the all the factors discussed in this blog, you will be able to design a DIY jewelry box that not only accomplishes the task for which it was intended but also reflects your unique sense of style and the level of skill you possess. Take pleasure in the imaginative journey as well as the sense of accomplishment that comes with creating your own jewelry storage solution. Hope this blog was of help, make sure to make your own jewelry box and share the method with your friends and family. Happy Reading!


.png)
.png)
.png)

.png)

.png)