

Jewelry boxes are not only useful ways to store your most treasured belongings, but they can also be lovely additions to the design of your space if you choose the right style and pattern. If you don’t feel like going out and purchasing a jewelry box, you may always exercise your ingenuity and fashion one out of boxes that you already have lying about the house. In this do-it-yourself tutorial, we’ll investigate how to turn ordinary boxes into jewelry boxes that are both fashionable and practical. Let’s begin by naming some of the different kinds of boxes that might be repurposed for this creative endeavor and that you might discover lying about your house:
Shoe Boxes
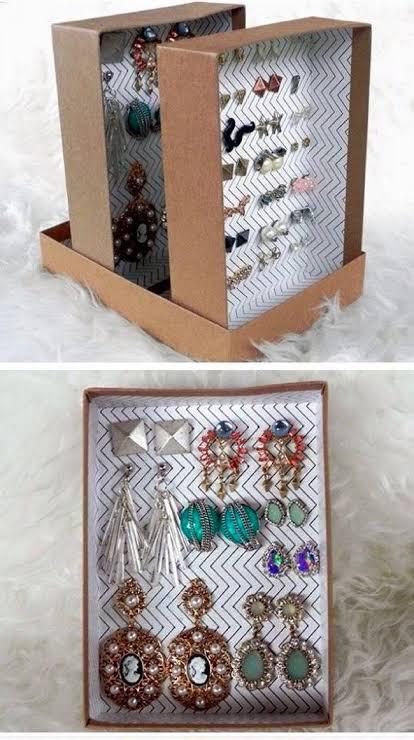
Because of their robust structure and generous size, shoe boxes are an excellent option to consider. They offer sufficient room for storing many different kinds of jewelry, such as bracelets, necklaces, rings, and earrings, among other options.
https://www.pinterest.com/pin/533395149598781030/
Packaging for Gifts
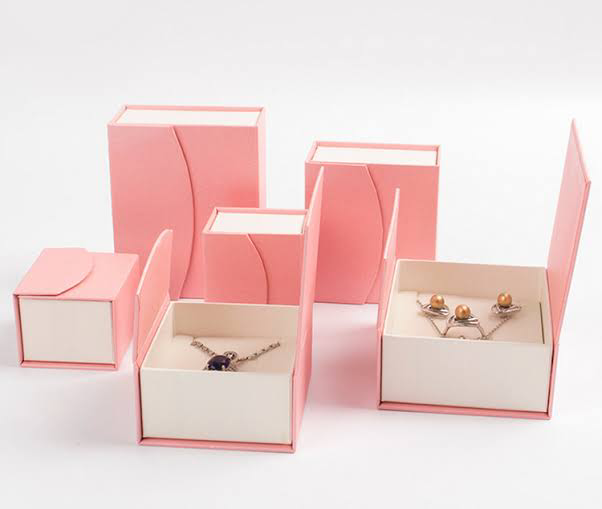
You can put those beautiful gift boxes that you’ve been hoarding for special occasions to good use by turning them into jewelry boxes. The DIY project you are working on could benefit from the attractive exteriors of these items.
https://gleepackaging.com/jewelry-gift-boxes/
Boxes Made Out Of Cardboard
With some ingenuity and handiwork, a solid cardboard box of any kind, such as those used for moving or packaging, can be repurposed into a jewelry box that serves its intended purpose.

http://www.sinostarpackaging.net/jewelry-box/paper-jewelry-box/cardboard-jewelry-box.html
Repurposed Wooden Boxes
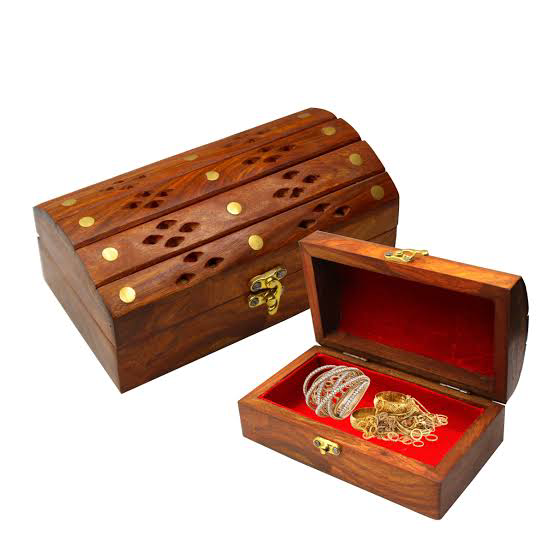
Repurposed wooden boxes, such as those used for packing wine or other things, can be transformed into attractive and country-style jewelry boxes.
https://stationers.pk/products/stylish-wooden-jewelry-box-antique-hand-made
Cigarette Packaging
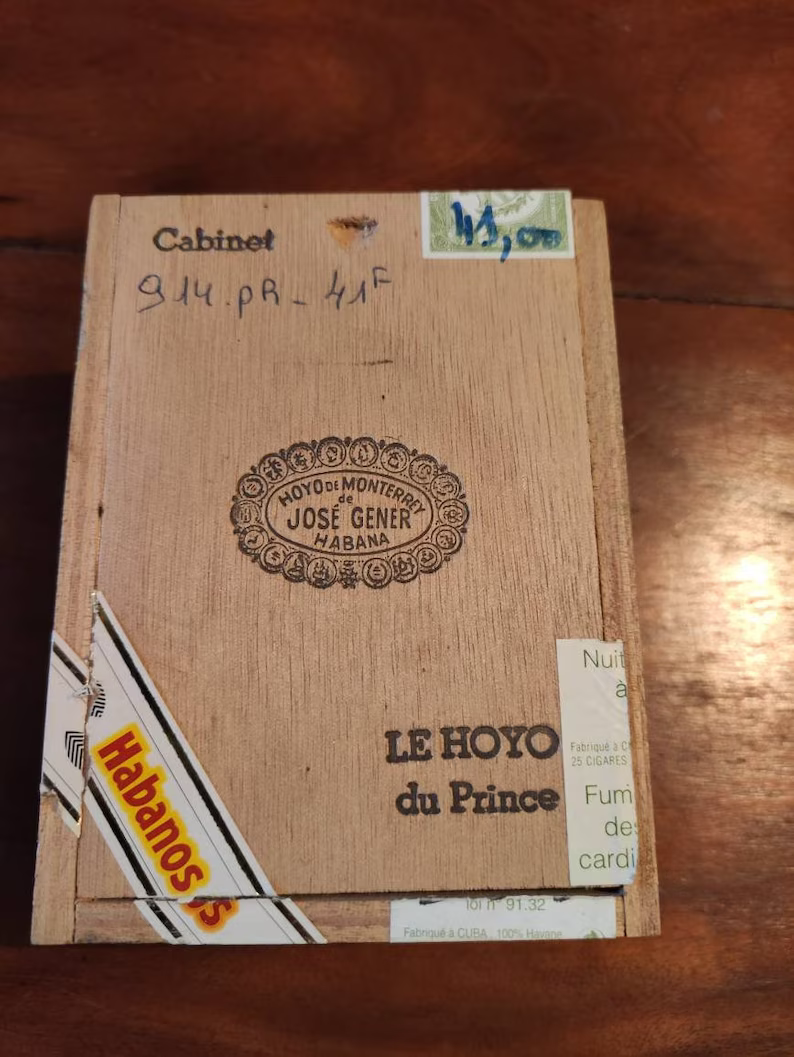
If you happen to have any empty cigar boxes laying around, you can give them a second life as one-of-a-kind jewelry boxes, and you can give them a look that is typically old or vintage.
Now, let’s have a look at how each of these boxes may be repurposed to become chic storage options for jewelry:
The following are some ways you can make a jewelry box out of shoe boxes:
Materials required are as follows:
- Box for shoes
- Fabric or patterned paper for embellishment
- Shears/Cutters
- Either glue or tape with two adhesive sides
- A fabric made of felt or velvet
- Knife for crafting (this is optional)
- Paint and a brush (this item is optional).
Here Are the Steps
1. Prepare the Shoe Box: To begin, take the lid off of the shoe box and set it to the side. You’ll only require the lowest section of it.
2. Cover the Exterior: Covering the exterior of your jewelry box with patterned paper or fabric will help give it a more modern appearance. To keep it in place, you can either use glue or tape with a double-sided adhesive. Before adding the ornamental layer, you can wish to paint the box if you want to give yourself some room for artistic expression.
3. Decorate the Interior: To line the inside of the box, cut a piece of felt or velvet cloth to the appropriate dimensions. The velvety lining will prevent your jewelry from becoming scratched in any way. Utilize glue to ensure that it stays in place.
4. Create Sections or Compartments: If you have several different kinds of jewelry, you might want to divide the box up into different sections. To accomplish this, you may choose to make use of smaller boxes or cardboard dividers. If necessary, adhere them in place using glue.
5. Make It Your Own: You may give the shoe box more of a personal touch by decorating the top of it. You may use paint, decoupage, or even make a collage out of different pictures or photos.
The following are some ideas for making a jewelry box out of gift boxes:
Materials required are as follows:
- A container for gifts
- Shears/Cutters
- Fabric or patterned paper for embellishment
- Either glue or tape with two adhesive sides
- A fabric made of felt or velvet
- Cardboard (to be used if desired).
- Knife for crafting (this is optional)
Here Are the Steps
1. Get the Gift Box Ready: To begin, select a gift box that is appropriate for your jewelry collection. Take out all of the previous contents and any decorations that were in the box.
2. Cover the Exterior: Just as you did with the shoe box, you can improve the look of the present box by covering the exterior with ornamental paper or fabric. This is similar to what you did with the shoe box. Put some glue on it or secure it with some double-sided tape.
3. Decorate the Interior: For the lining of the inside of the box, cut a piece of felt or velvet cloth to the appropriate size. Creating a cushioned and secure platform for your jewelry can be accomplished by gluing it in place.
4. Create Compartments: If the gift box is too big, you might want to consider adding dividers made of cardboard so that it can be more organized. Take the measurements needed to ensure that the cardboard will fit inside the box, and then cut it into portions to accommodate the various types of jewelry.
5. Consider Adding Personal Touches: If you want the jewelry box to have a look that is completely unique to you, you might think about adding some personal touches to the outside. You can adorn it in whatever way you choose by using ribbons, bows, or even paint.
The following are some ideas for making a jewelry box out of cardboard boxes:
Materials required are as follows:
- Box made of cardboard
- A pair of shears or a hobby knife
- Monarch
- Fabric or patterned paper for embellishment
- Either glue or tape with two adhesive sides
- A fabric made of felt or velvet
- Cardboard (for use as dividers, if that becomes necessary)
Here Are the Steps
1. Select the Cardboard Box: When selecting the cardboard box for your jewelry box, be sure to select one that has the appropriate size and style for your needs. It could be a little box for shipping, or it could be another durable cardboard container of some kind.
2. Chop and Cover: Remove the top flaps from the box, and then cover the outside with a fabric or beautiful paper covering. Use glue or double-sided tape to keep it in place while it dries.
3. Decorate the Interior: To prevent damage to your jewels, you should line the inside of the box with a felt or velvet cloth. Attach it to the cardboard box using glue.
4. Create Compartments: Creating sections is a good idea to consider if your cardboard box is huge and you want to arrange your jewelry collection. You can make separators by gluing additional cardboard pieces into position to create separate compartments.
5. Make It Your Own: The exterior of the cardboard box can be customized in the same way as the exterior of other types of boxes by adding personal touches. You can paint it, embellish it, or even apply decoupage techniques if you want to.
The following are some ideas for making a jewelry box out of wooden boxes:
Materials required are as follows:
- Chest made of wood
- Sandpaper (added at your discretion)
- Priming and painting (not required)
- Fabric or patterned paper for embellishment
- Shears/Cutters
- Either glue or tape with two adhesive sides
- A fabric made of felt or velvet
- Hinge(s), if desired (optional)
- Latch (this step is optional)
Here Are the Steps
1. Prepare the Wooden Box: Sandpaper should be used to smooth down any uneven surfaces or edges that may be present on the wooden box. In addition, you can create the desired finish on the box by priming and painting it.
2. Cover the Exterior: The appearance of the wooden box can be improved, in the same way as the appearance of other boxes, by covering the exterior with decorative paper or fabric. Put some glue on it or secure it with some double-sided tape.
3. Line the Interior: To prevent your jewelry from becoming scratched, you should line the interior of the wooden box with a piece of fabric made of felt or velvet.
4. Add Hardware: If your wooden box does not already have hinges and a latch, you can purchase these separately and attach them to make a jewelry box that is functional and can be opened and closed in a secure manner.
5. Personalize: the wooden box by adding any decorative features or paint designs that reflect your own unique sense of style. *Personalize* the box. *Personalize* the box.
The following are some ideas for making jewelry boxes out of cigar boxes:
Materials required are as follows:
- Box for cigars
- Grain of sand
- Undercoat and topcoat
- Fabric or patterned paper for embellishment
- Shears/Cutters
- Either glue or tape with two adhesive sides
- A fabric made of felt or velvet
- Hinge(s), if desired (optional)
Latch (this step is optional)
Here Are the Steps
1. Put the finishing touches on the cigar box: Sand the outside of the cigar box to achieve a smooth surface before moving on to the interior. In addition to that, you can prime it and paint it in the color of your choice.
2. Cover the Exterior: To make the cigar box look more appealing, you should cover the outside of it with some kind of decorative paper or cloth. Apply glue or use tape with a double-sided adhesive to keep the material in place.
3. Safeguard Your Jewelry by Lining the Interior with Felt or Velvet Fabric: You should safeguard your jewelry by lining the interior of the cigar box with felt or velvet fabric.
Following these procedures, you may turn ordinary boxes into elegant and functional jewelry storage. The options are unlimited, allowing you to design personalized jewelry boxes that secure your treasures and enhance your décor. Reusing boxes from around the house is an eco-friendly and affordable method to make a jewelry box masterpiece.
https://youtu.be/SSGz8iUPPiY?si=T02_N1DMHVlkD2Wv
https://youtu.be/hecfnm5Aq9s?si=BpkKOpysKDDZAZXA


.png)
.png)
.png)

.png)

.png)