

Choose jewelry display stands by starting with the viewing moment, the jewelry’s support points, and the way staff will handle each piece. A suitable stand must hold the item at a useful angle, protect polished surfaces, remain stable during customer interaction, and fit the visual rhythm of the counter. Material and color come later: they should support the jewelry, lighting, brand palette, cleaning routine, and rollout plan rather than dictate the structure.
For a mixed collection, do not buy every stand as an isolated object. Plan a coordinated system of necklace forms, earring holders, ring supports, bracelet bars, trays, risers, and logo elements. This guide shows how to build that system without letting the display overwhelm the product.
Begin With the Viewing Moment, Not the Material
A velvet surface may look luxurious in a close-up, while clear acrylic can keep a small counter visually open. Neither is automatically right. The first question is where the display will be seen and how quickly it must communicate. A window composition works at a distance; a service counter must support safe handling; a trade-show setup must pack efficiently; and product photography needs controlled reflections.
|
Setting |
What the display must do |
Useful stand direction |
|
Service counter |
Keep pieces organized while allowing assisted try-on |
Stable, compact stands with clear front access and soft contact points |
|
Window or focal zone |
Create a readable silhouette from several metres away |
Bolder forms, varied heights and fewer pieces per focal group |
|
Pop-up or trade show |
Assemble quickly and travel with limited damage |
Lightweight, modular parts with protective individual packing |
|
Photography or livestream |
Control reflections and preserve accurate product colour |
Matte neutral surfaces, removable supports and adjustable composition |
Map Every Jewelry Shape to a Support Point
The best-looking stand can still fail if the jewelry twists, slides, tangles, or hides its most important detail. Review the product from the clasp to the centrepiece and identify where gravity acts. The display should restrain movement with the fewest visible contact points. Soft coverings are useful only when seams, edges, and adhesive areas stay away from polished metal and delicate stones.
|
Jewelry form |
Support problem to solve |
Check before approval |
|
Short necklace or pendant |
Centre the pendant without lifting the chain unnaturally |
Chain path, neckline width and pendant clearance |
|
Long chain or layered necklace |
Prevent tangling while preserving drop length |
Usable height, rear hooks and spacing between layers |
|
Stud, hoop or drop earring |
Keep the pair aligned and easy to remove |
Hole or slot size, post clearance and card thickness |
|
Ring |
Show the head without stretching or scratching the shank |
Slot compression, viewing angle and stone clearance |
|
Bangle, cuff or watch |
Support the curve without forcing the closure |
Bar diameter, opening width and anti-roll stability |
Build a Sightline Before You Build a Set
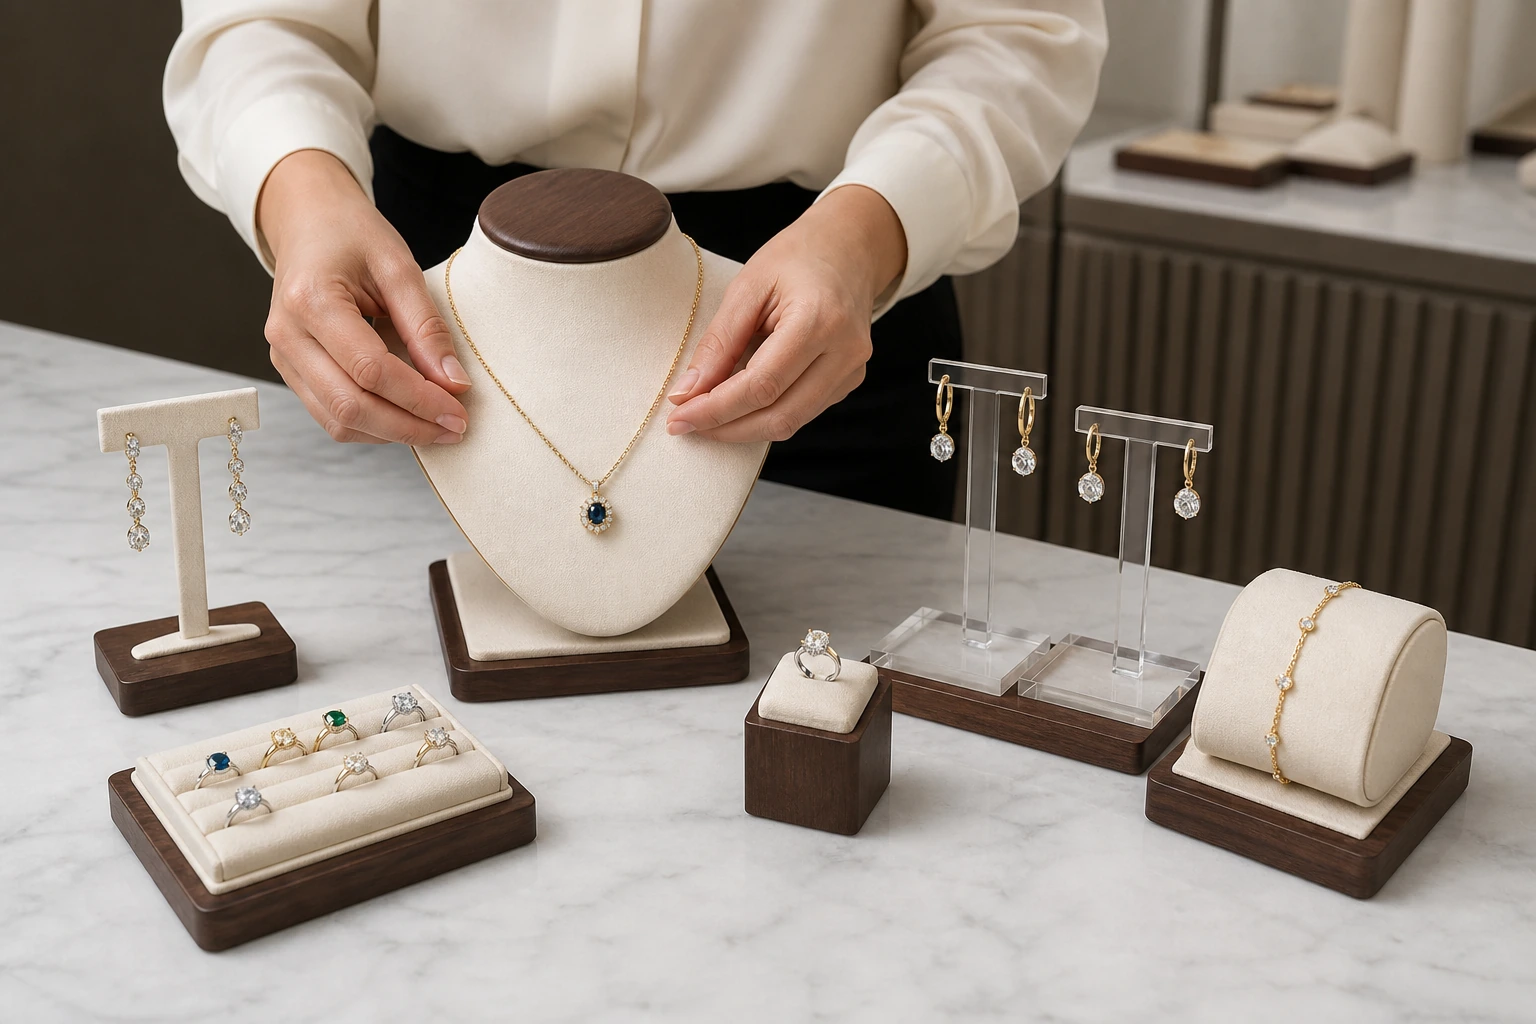
A retail display needs hierarchy. Select one hero height for a new launch or high-value piece, a middle layer for comparison, and a low layer for accessible supporting products. Keep negative space around the hero instead of filling every surface. From the shopper’s normal approach, confirm that price cards, locks, cabinet edges, and neighbouring stands do not hide the jewelry.
- · Sketch the counter footprint and the shopper’s main approach angle.
- · Mark the maximum height allowed by the showcase and lighting.
- · Place the hero product first, then add supporting pieces by category or story.
- · Check staff reach and the path used to remove each item.
- · Photograph the loaded composition from customer eye level before approving quantities.
Judge Materials Under the Store’s Actual Light
A sample viewed in an office may behave differently under warm spotlights or high-output LEDs. Gloss acrylic can create crisp reflections; suede-like surfaces absorb light but may show lint; painted wood provides mass and warmth; metal adds slender structure but makes finish consistency highly visible. Request physical swatches and place real jewelry on them before choosing a palette.
|
Surface direction |
Visual effect |
Operational question |
|
Clear or opaque acrylic |
Clean geometry and strong colour control |
Will edges, scratches and reflections remain acceptable after cleaning? |
|
Velvet, suede or microfiber |
Soft contrast and reduced glare |
Can staff remove dust without changing the pile direction? |
|
Painted or veneered wood |
Warm, substantial presentation |
Are corners, colour and surface sheen consistent across parts? |
|
Metal or mixed material |
Slim profiles and architectural detail |
Are welds, joints, plating and contact pads clean and stable? |
Create a Family Resemblance Without Making Every Stand Identical
Consistency comes from repeated design rules, not one repeated shape. Use a limited palette, a shared base thickness, related corner radii, and a controlled set of heights. Necklace forms can remain sculptural while earring holders stay light and open. Removable logo blocks, risers, and trays let the same base collection adapt to seasonal launches without replacing the entire display.
Ask the supplier to prepare a set map with component names, dimensions, finish codes, and placement references. This becomes the control document for reorders and new store openings. If a custom colour is critical, approve it on the final substrate rather than relying only on a digital colour value.
Test the Display as a Loaded Retail Scene
Approve a prototype with the exact types and sizes of jewelry it will carry. Load it for a normal selling period, move pieces through the staff handling routine, and inspect contact areas afterward. The review should include visual balance, stability, removal speed, surface marking, logo alignment, and packing protection. A bare stand can hide problems that appear only after weight and tension are applied.
1. Load the lightest and heaviest intended pieces.
2. View the display from the main customer angles and under store lighting.
3. Remove and replace each item several times using the normal sales routine.
4. Inspect soft surfaces, edges, hooks, slots and joints for marks or movement.
5. Repack the components and confirm that finishes cannot rub during transport.
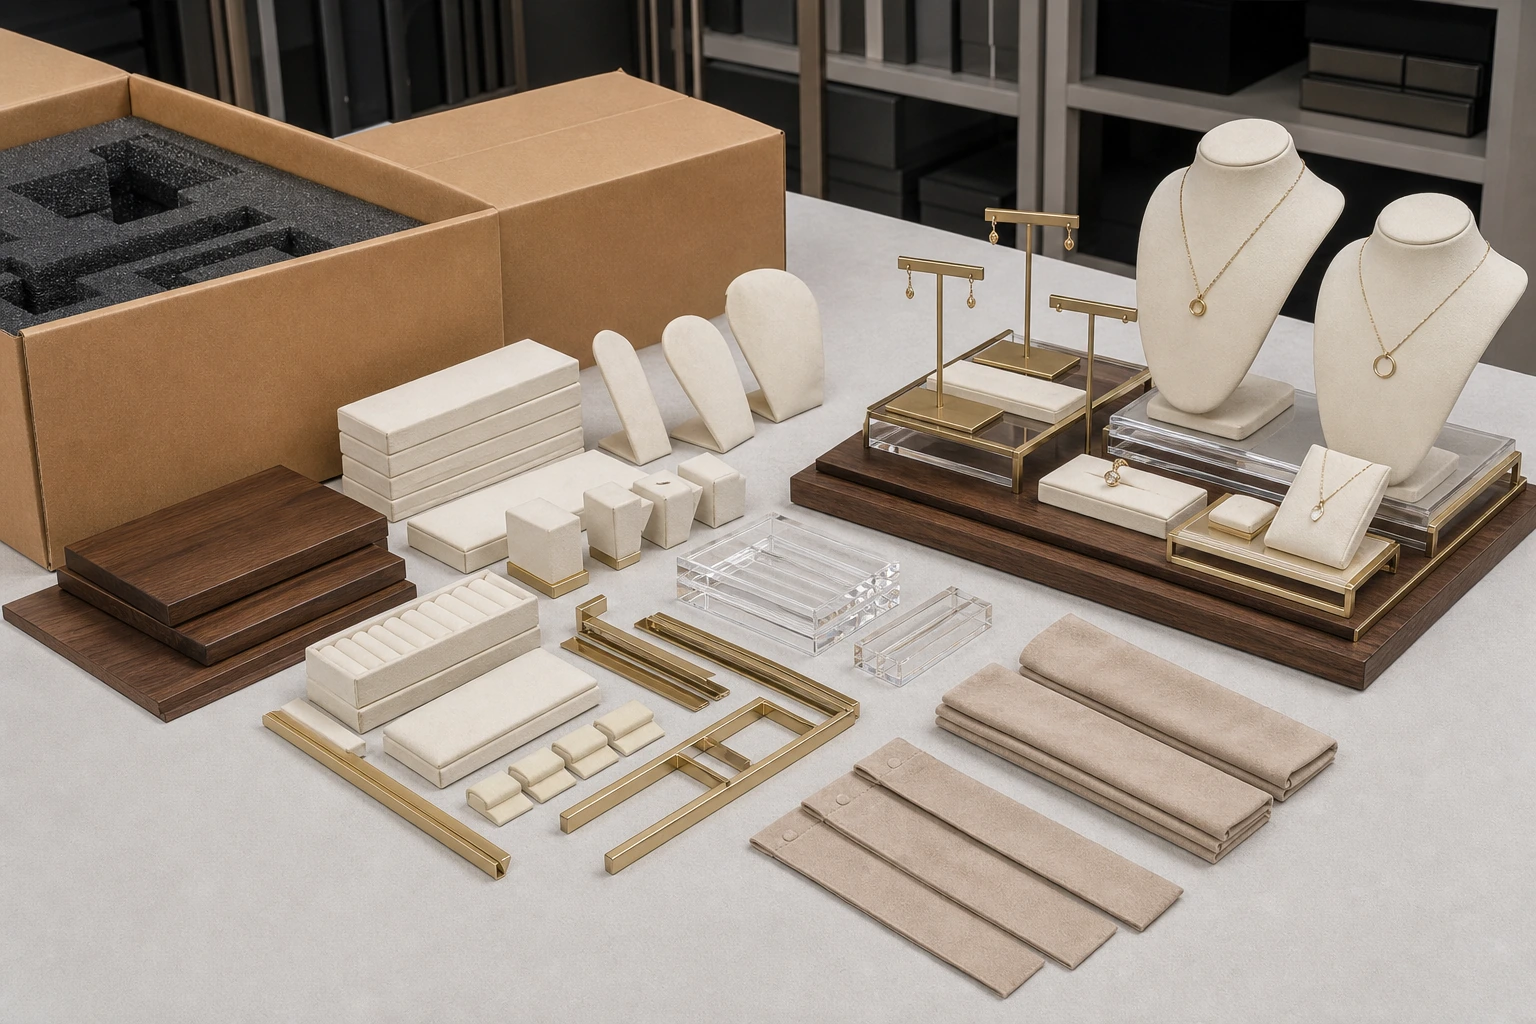
Plan the Rollout, Repacking, and Replacement Parts
For multiple locations, the display must arrive as a repeatable kit. Give every component a code, quantity, finish reference, placement image, and packing position. Confirm which parts can be replaced independently, especially pads, earring cards, hooks, pillows, and logo blocks. A clear kit list reduces improvisation by store teams and makes seasonal refreshes easier to manage.
- · Store-by-store component list and counter footprint
- · Assembly or placement guide using photographs
- · Individual protection for surfaces and protruding parts
- · Spare-part naming and reorder references
- · Cleaning method approved for each surface
- · Final loaded-display photograph for visual merchandising teams
Questions Buyers Ask Before Ordering Display Stands
Should every jewelry category use the same material?
No. A coordinated set can mix materials when colour, base geometry, height rhythm, and branding remain controlled. The support surface should suit the jewelry and handling pattern.
Are transparent acrylic stands always less visible?
They can visually recede, but edges and reflections may become prominent under spotlights. Test the chosen thickness, finish, and lighting together.
How many heights should a counter display use?
Use only enough levels to create a focal point and readable groups. The right number depends on the case height, viewing distance, assortment density, and staff access.
What should be included in a supplier brief?
Provide jewelry types and dimensions, counter size, viewing direction, reference mood, materials or colour targets, logo artwork, component quantities, delivery market, and the required packing format.
Turn Your Display Plan Into a Quote-Ready Brief
A productive inquiry is more than a reference image. Send the counter dimensions, jewelry mix, key product measurements, required stand types, brand palette, logo file, material direction, store quantity, and destination market. Identify which elements are fixed and where you want structural recommendations. This gives the supplier enough context to discuss feasibility, prototype scope, finish control, and packing as one coordinated project.
view jewelry display stand options;send your project requirements


.png)
.png)
.png)

.png)

.png)